top of page


Before:
Our starting point was a galley style 1940s kitchen with layers of cheap updates, creating an uncohesive room in desperate need of some functional and stylistic relief.
Space and Storage Inefficiencies
Prior to the rennovation, cabinet space was not maximized, so storage ended up spilling into sight, onto the counters and appliances. Continuity between the kitchen and dining room was interrupted by a wall with a narrow doorway making making small spaces feel even smaller and interactions between family members in each room challenging.

Cabinets leaving dead space
Bulk items kept atop fridge
Spices and pans "stored" out in the open without a home

Doorway access to kitchen creating cramped and isolated spaces in both rooms
Aging Elements
In a home built in 1940, there are things that petina and things that need to be replaced, and in a kitchen used three times a day for eighty years, most everything was the latter; doors that don't close, hardware-less drawers, layers of bad DIY jobs, water damage, un-insulated walls, electrical that doesn't meet code...to name a few.


Power strip outlets that do not meet code
Doors and drawers not closing properly
Old DIY paint jobs with wrong sheen
Water damaged cabinetry
No insulation behind exterior walls
Poor Lighting
Prior to the rennovation, the kitchen only had two light sources in the center of an elongated room that left the ends in the dark. Additionally the cabinets had no lighting to illuminate work surfaces. This resulted in an uninviting and unfunctional space.

Two light source with no aesthetic value

No countertop lighting
Sink not centered with window
The Plan
Left Side

Sink centered with window
Under cabinet lighting
Lighting spaced out throughout room
To - code Backsplash outlets
Cabinets that fully utilize all space
Right Side
.jpeg)
More cabinetry in void spaces to store items infrequently used
Slimmer, taller fridge allows more counter space
To - code Backsplash outlets
The Moodboard
These were the initial vibes. Fresh greens, balanced with dark woods. Old enough to look charming, young enough to feel playful. Patterns and textures that invite you into the excitement.


Natural wood and painted cabinets


Galley style done well
Maintaining appropriate age and character

Keeping it playful!

Tying in terra cotta floor
Prep Work
A kitchen can only be out of commission for a week or two at most. So anything that can be pre-assembled, pre-painted, or staged for install needs to be before demo.

Opened up the doorway into a full archway in a style that matches the rest of the house

Custom built the lower cabinet faces with walnut, Shaker style

Upper cabinets were made of and MDF panel framed by poplar and painted
Demolition
The kitchen had no insulation in the walls, and nearly every element was long past its prime, so everything down to the studs had to be torn out. The only surface that survived was the Spanish tile.

.jpg)
Rebuilding
When the room is bare is the chance to right set all the fundamental electrical, plumbing, and lighting issues. During this phase we centered the sink with the kitchen window, installed backsplash outlets for all work stations, and wired up lighting in a more evenly spread layout so no work space was left dim.


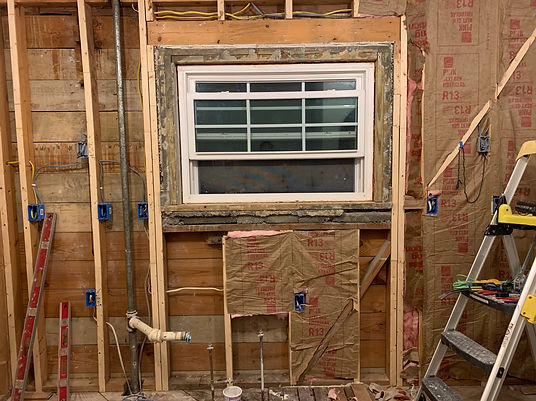
Exterior walls getting insulation!
Proper backsplash outlets put into place
Full size chalk drawings of how to rework the plumbing

.jpg)
Adding character into places it was missing

.jpg)


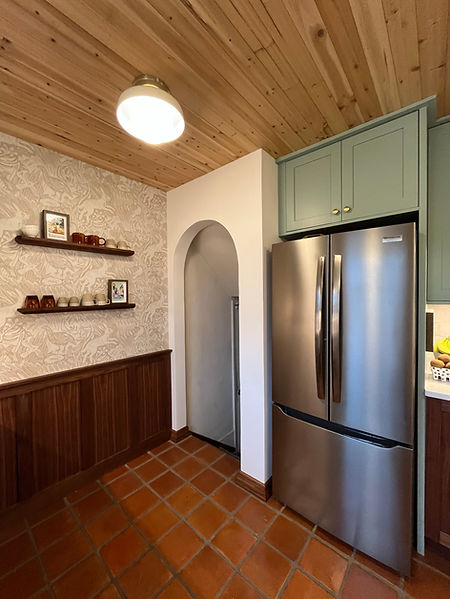
The old drywall on the ceiling was so irregular it needed to be completely skimcoated smooth, or covered with something new. Wood paneling felt like a high risk/reward option that could leave the small kitchen space feeling either cramped or cozy. Fortunately the natural warmth of the cedar tongue and groove accomplished the latter.


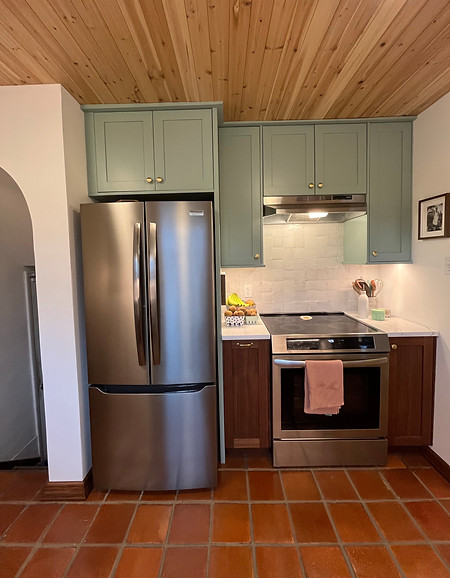
Zellige backsplash and quartz countertops installed
Completed


.jpeg)

bottom of page